前言
平常大家开发每个页面骨架大致相似,每次开发新页面都要一步一步的配置,相当繁琐。有了Plop,就可以实现自动化了,Plop 旨在根据模板文件自动化创建组件,接下来我就来介绍一下Plop如何帮助我们在开发过程中提高工作效率。
安装
可参考 https://github.com/plopjs/plop
1 | npm install --save-dev plop |
然后在项目的根目录创建一个plopfile.js
1 | module.exports = function (plop) {}; |
快速上手
配置
大致涉及这些文件:
1 |
|
1 | //plopfile.js |
先来一个简单点的配置
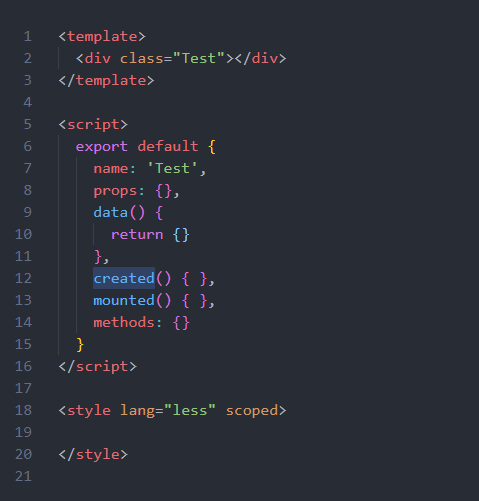
1 | //plop-templates/view/index.hbs |
1 | //plop-templates/view/prompt.js |
1 | //plop-templates/utils.js |
1 | //package.json |
运行
1 | yarn new |
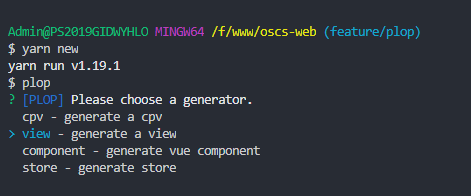
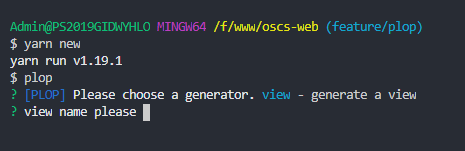
这样即可创建完成了。
使用
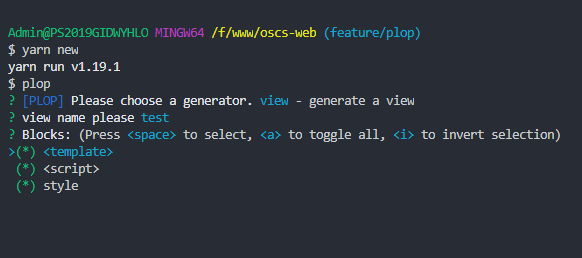
plop命令相关主要借助prompt和Inquirer
prompt 主要是命令行输入表单控件,它的相关功能:
- 提示用户输入
- 支持默认值和字段
- 验证
- 各种提示
1 | //表单 |
1 | //这是可用于验证和提示控件的属性的概述: |
Inquirer 交互式命令行工具 相关功能:
- 提供错误回调
- 询问操作者问题
- 获取并解析用户输入
- 检测用户回答是否合法
- 管理多层级的提示
| 参数 | 含义 |
|---|---|
| type | 类型 相关值有:input,number,confirm, list,rawlist,expand,checkbox,password,editor |
| name | 存储当前字段的变量 |
| message | 问题的描述 |
| default | 默认值 |
| choices | 列表选项 |
| validate | 验证 |
| filter | 过滤 |
| transformer | 对用户回答的显示效果进行处理 |
| when | 根据前面问题的回答,判断当前问题是否需要被回答 |
| pageSize | 渲染行数 |
| prefix | 修改 message 默认前缀 |
| suffix | 修改 message 默认后缀 |
| askAnswered | 如果答案已经存在,则强制提示该问题。 |
| loop | 启用列表循环。默认值:true |
有了这些配置,我们就可以定义自己的模板了。
最后贴一下部分配置代码:
1 | //在指定文件创建模板和它的组件 |